Event Rescheduled - How to Update the Event and Get a New Calendar Link
Creation Date: Jul 31, 2025
Created By: Bridget Fairbanks
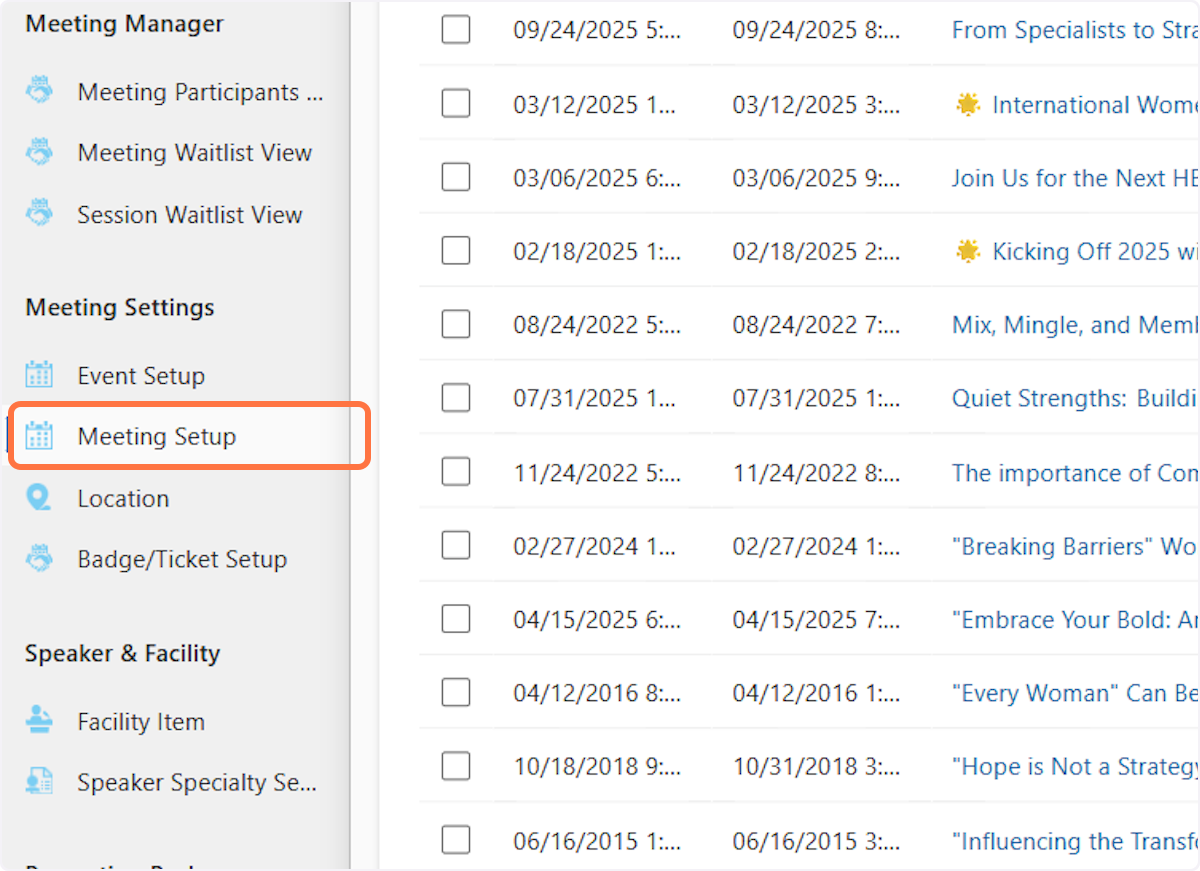
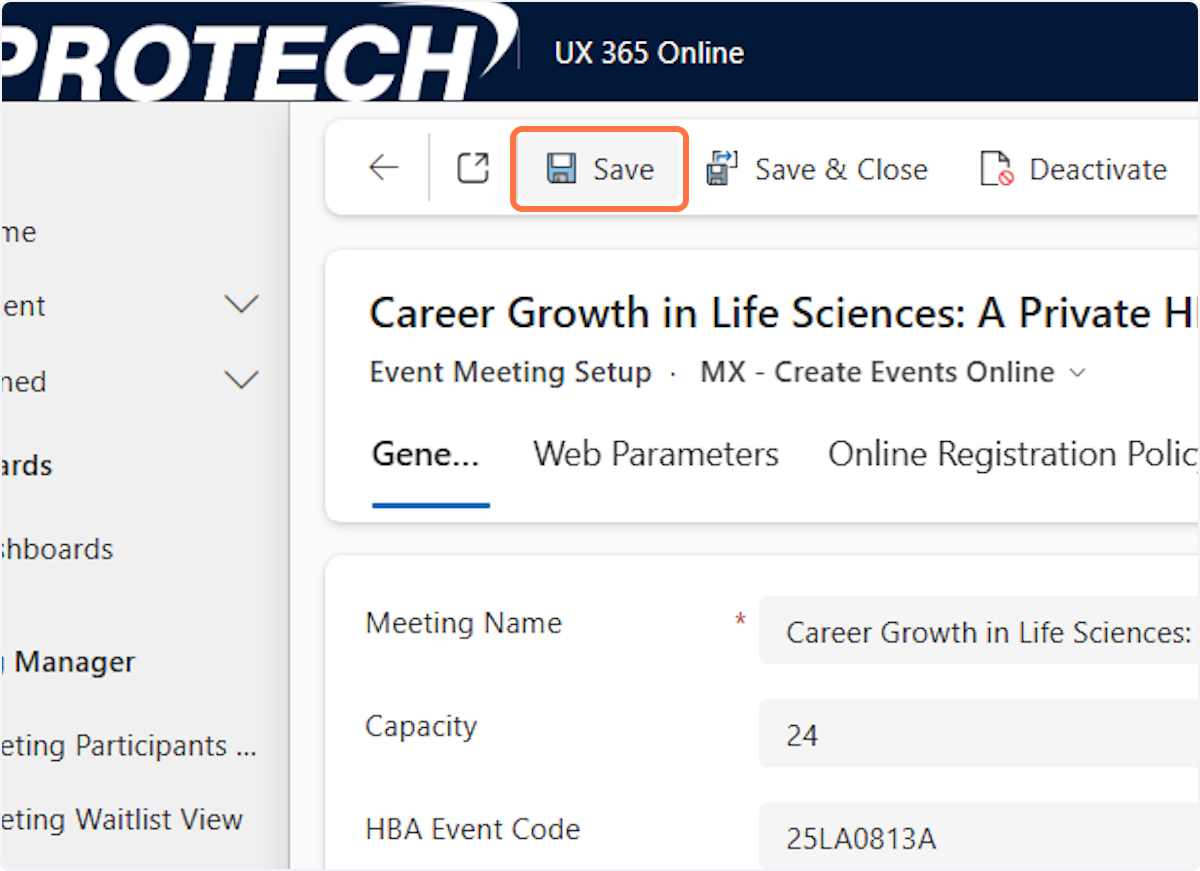
1. Click on Meeting Settings
2. In the Search bar, type the name of the event you need to update
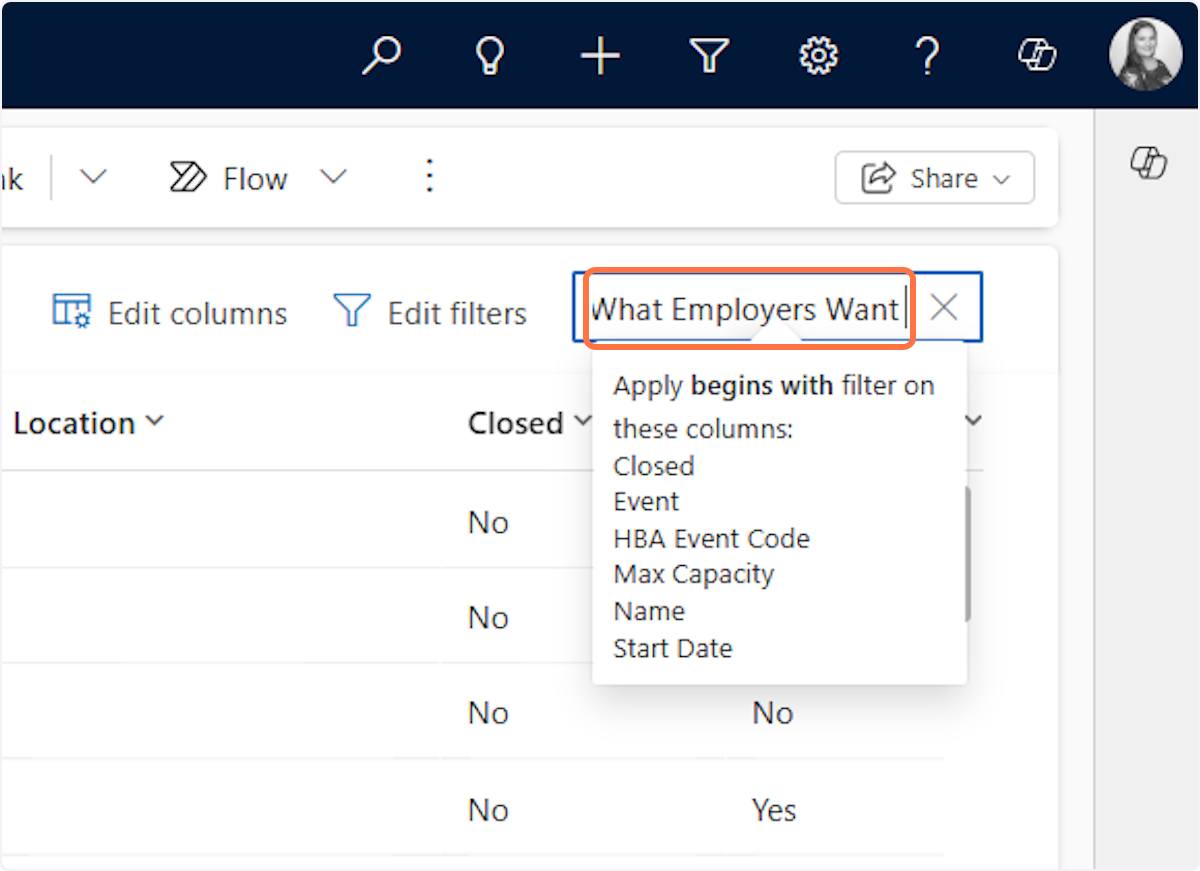
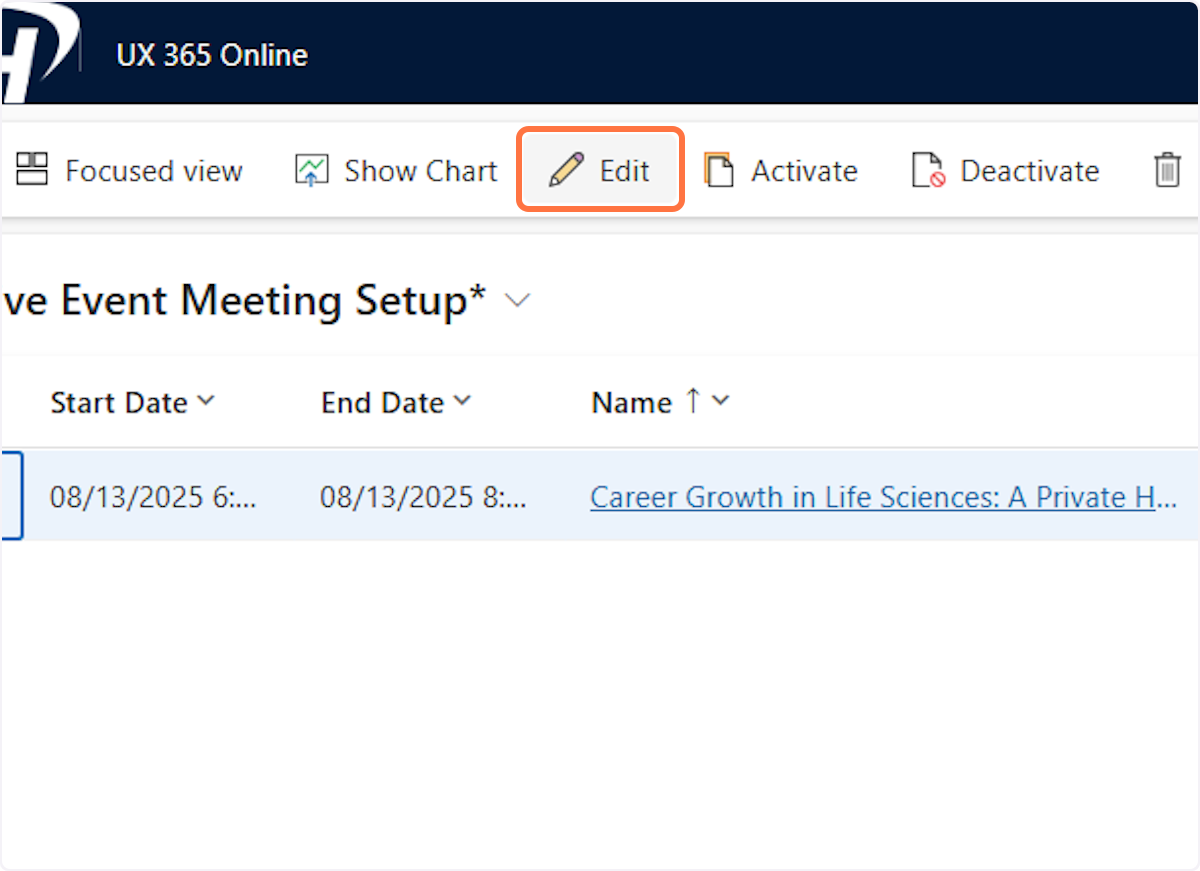
3. Click on the event to select it, and then click on Edit
4. In the Meeting calendar link remove the current text link

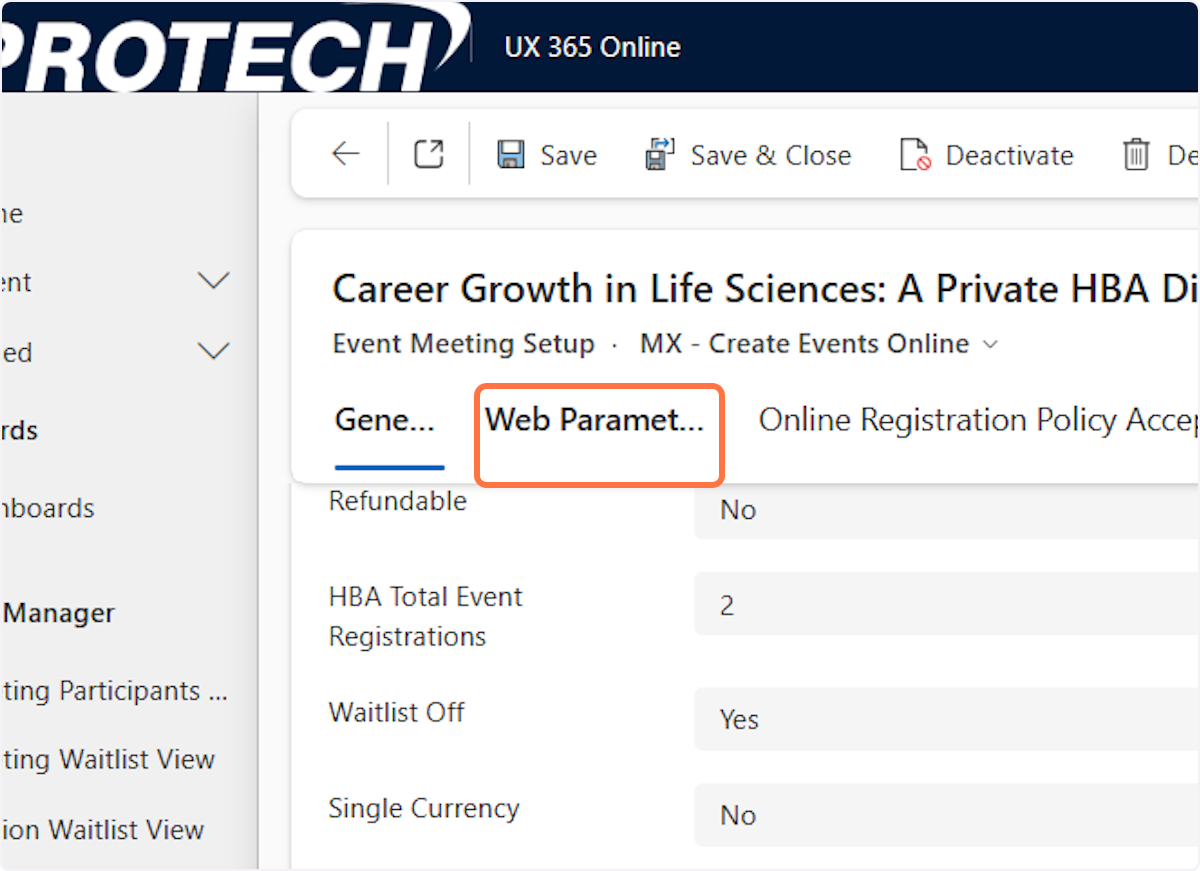
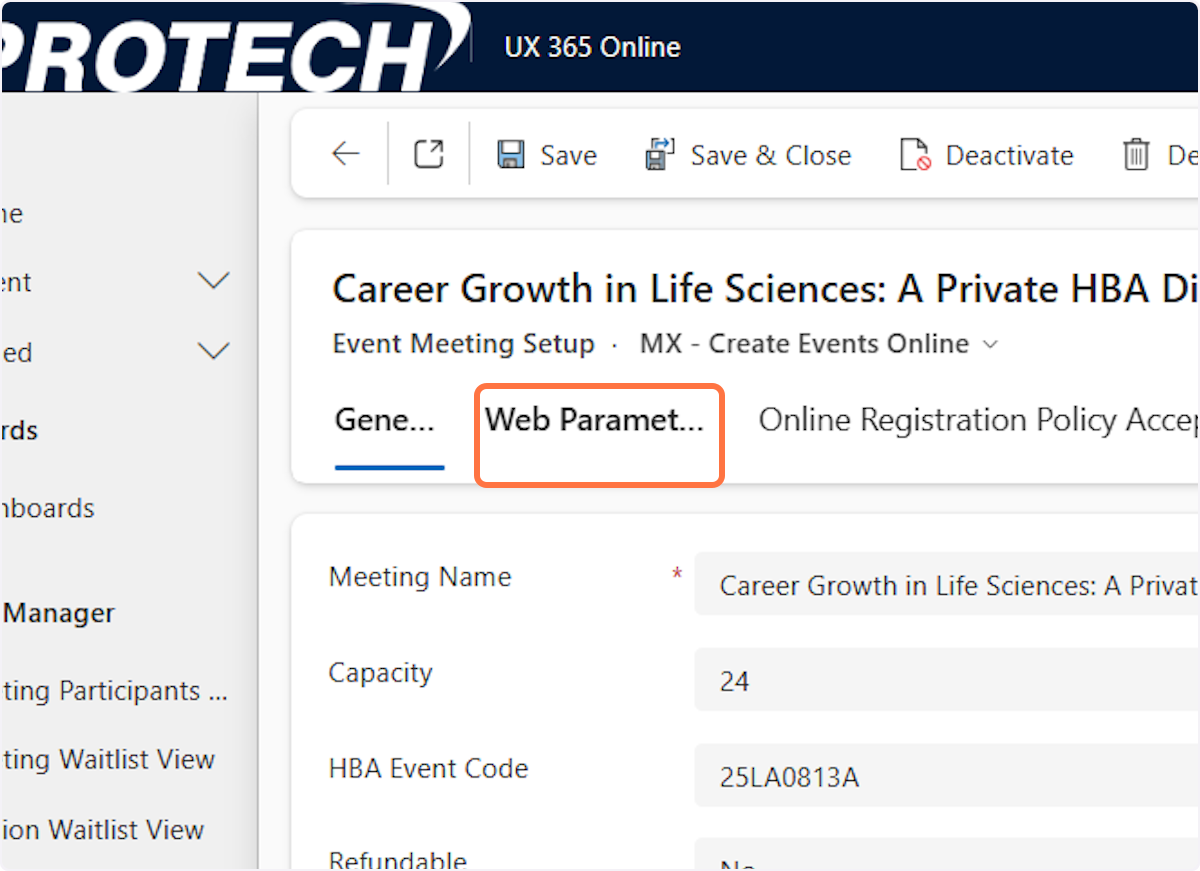
5. Click on Web Parameters
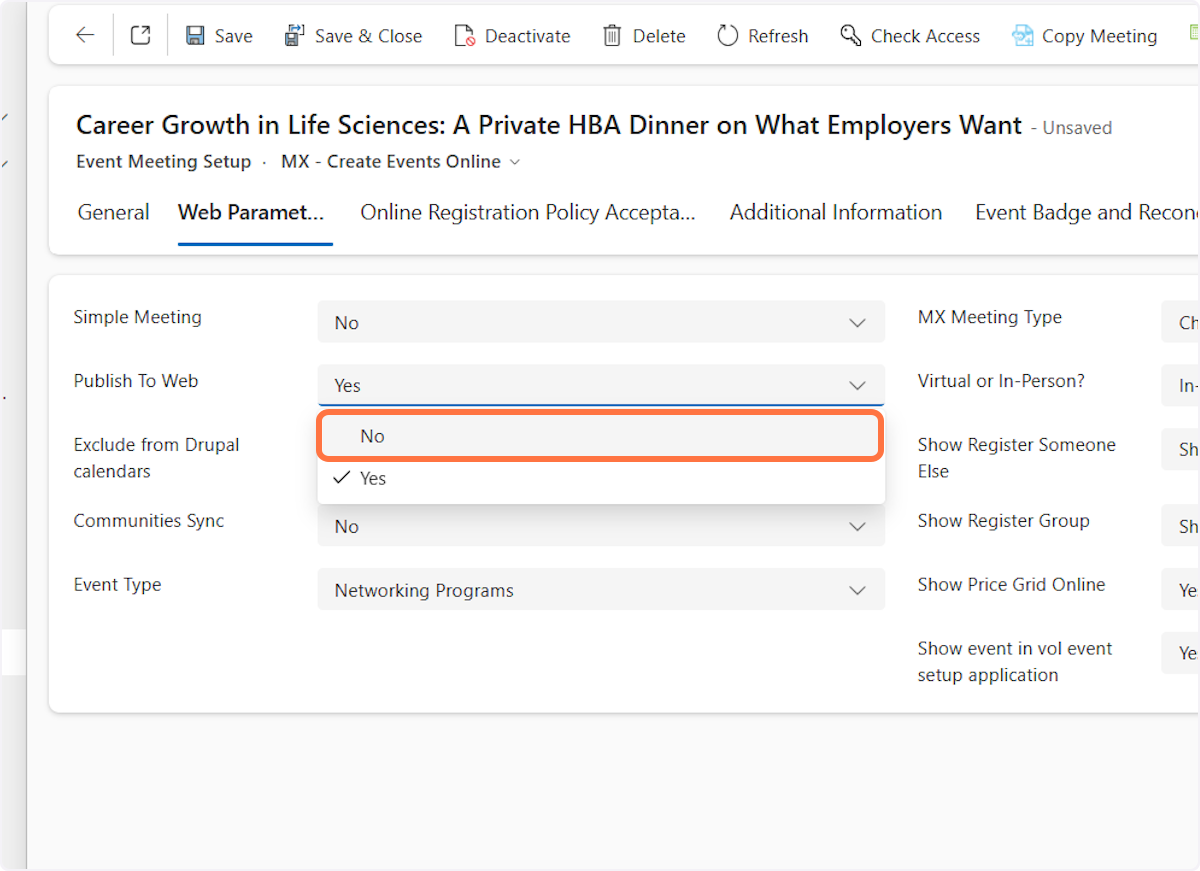
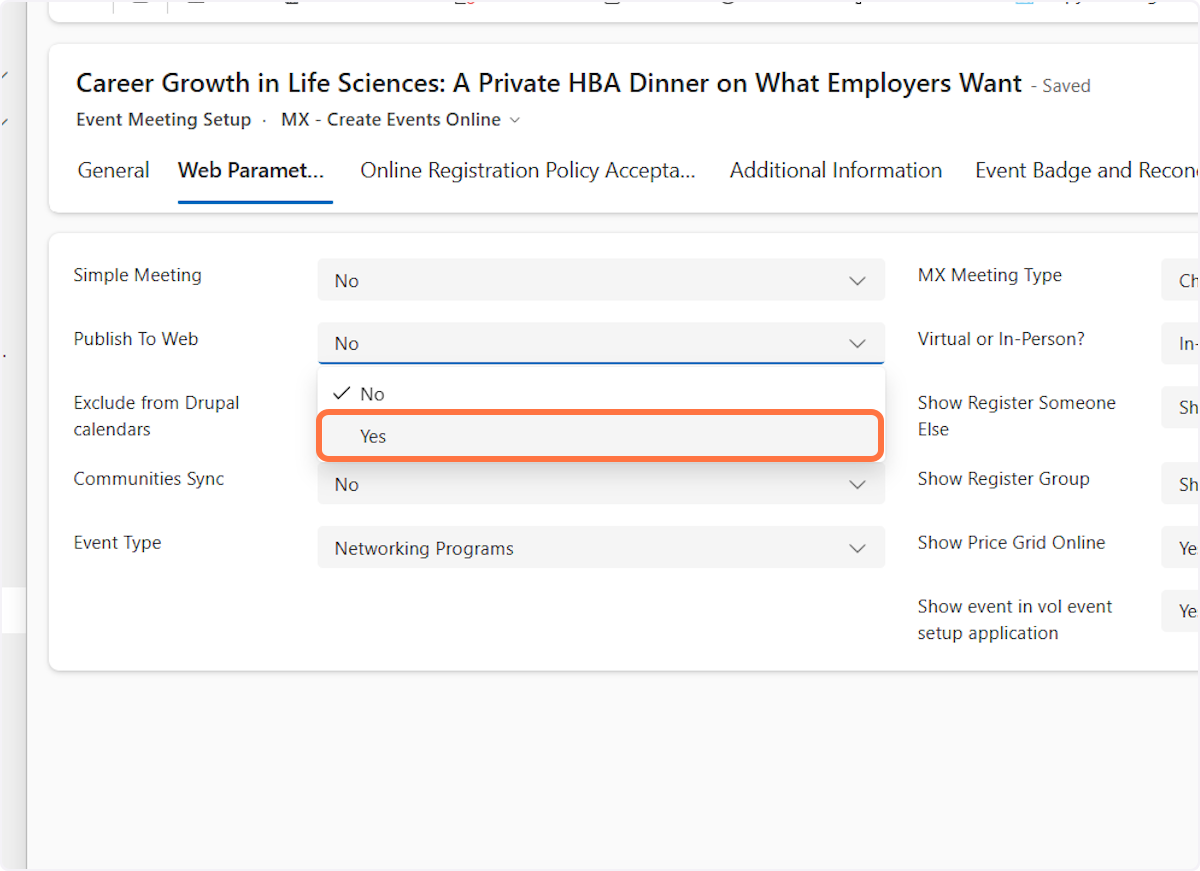
6. In the Publish to Web field change the flag from Yes to NO
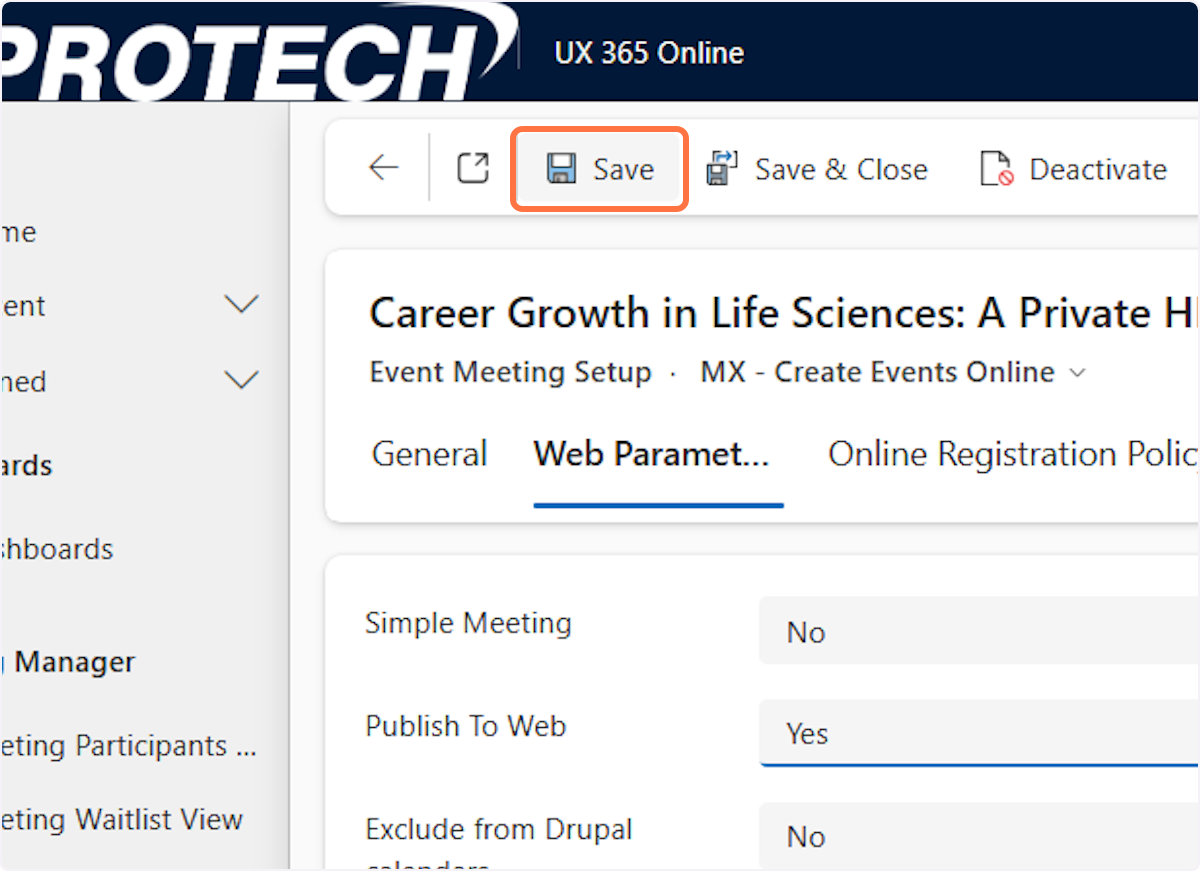
7. Click on Save

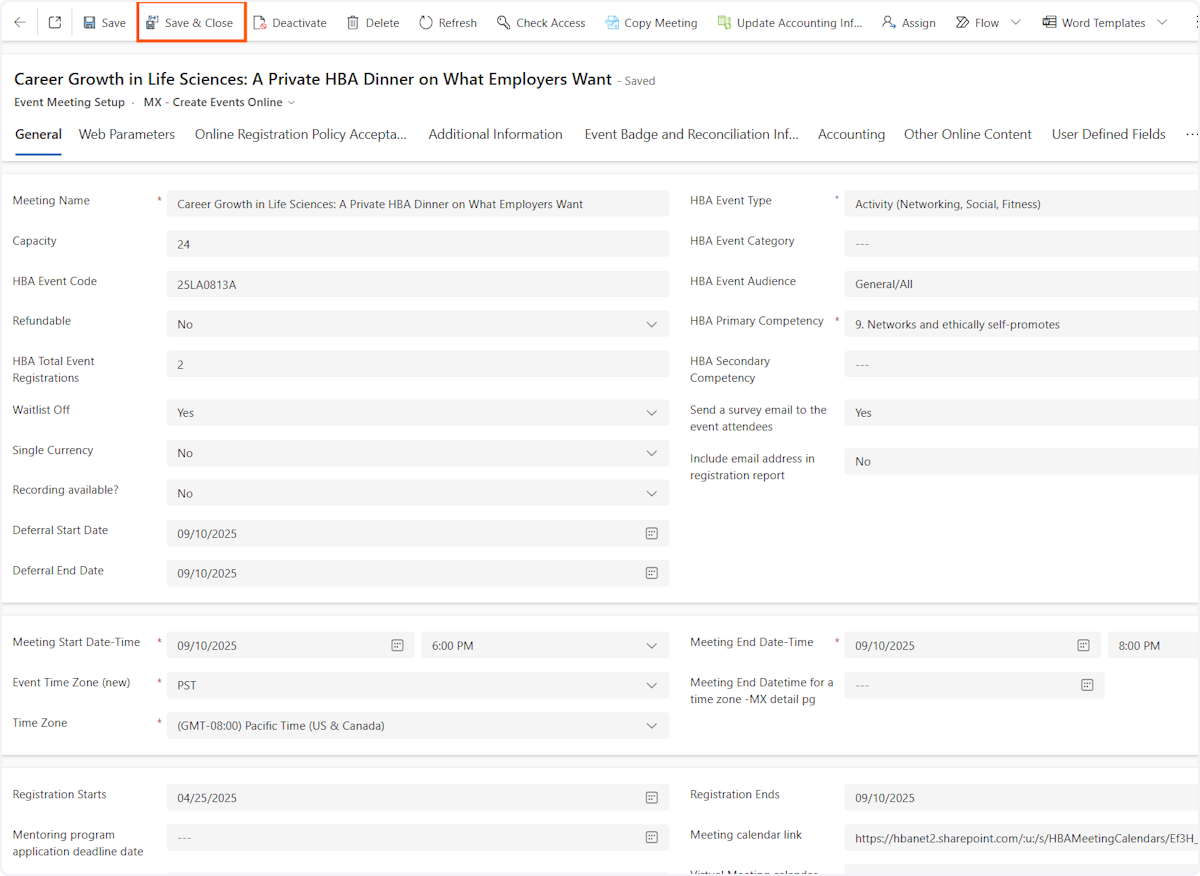
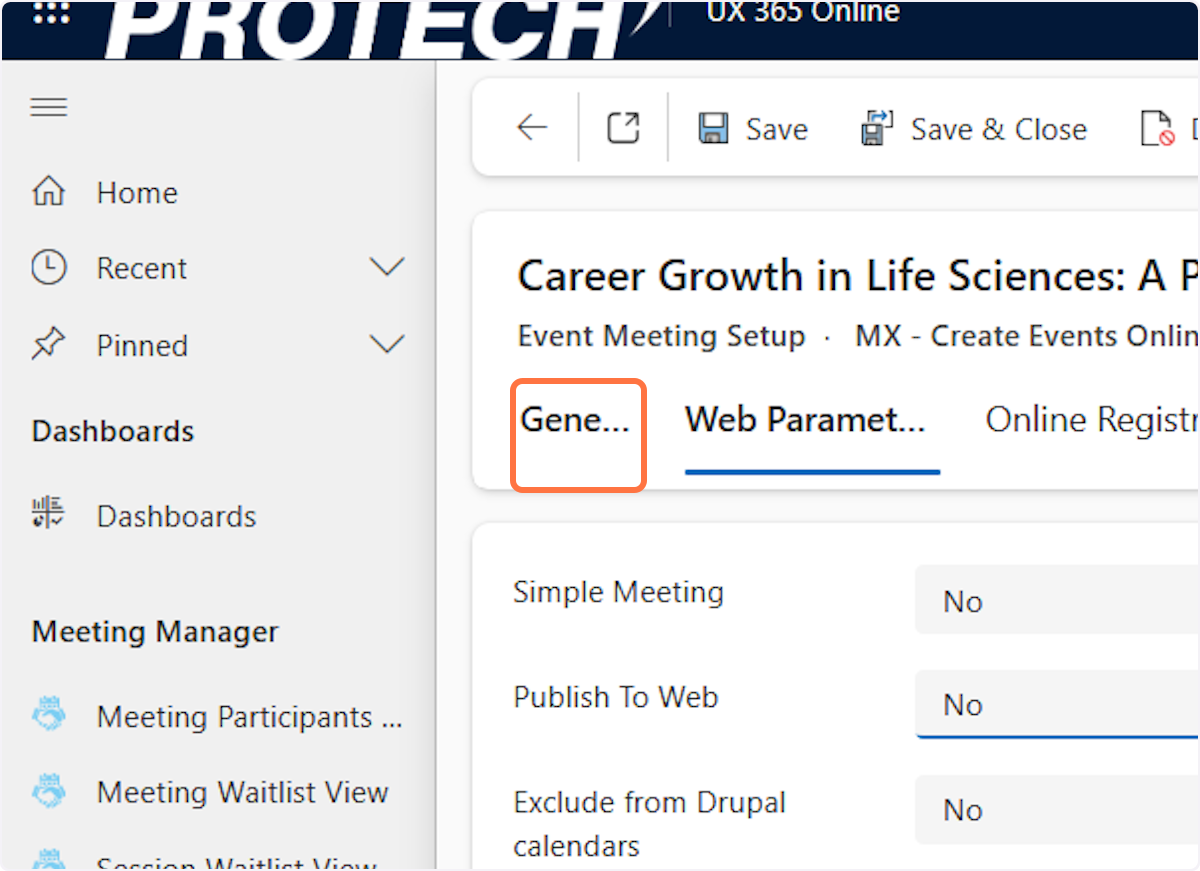
8. Click on General
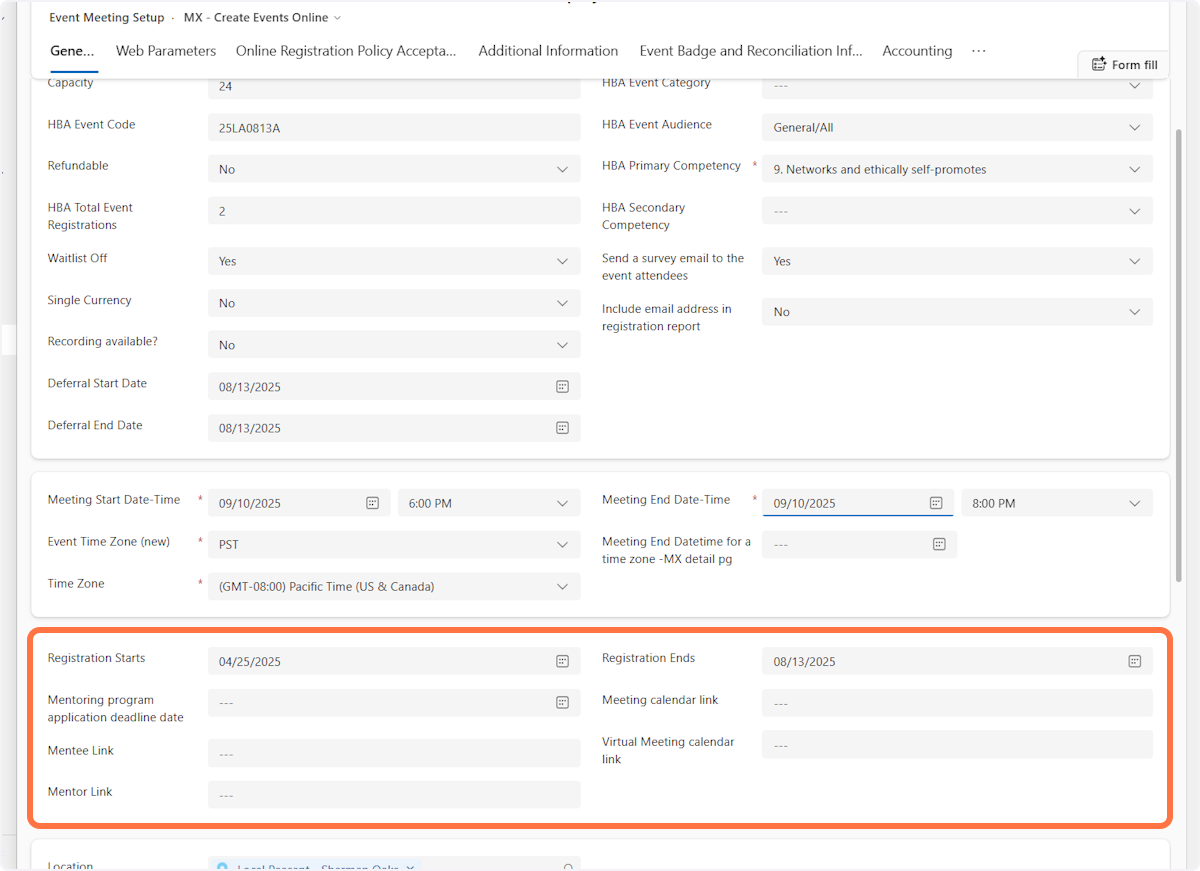
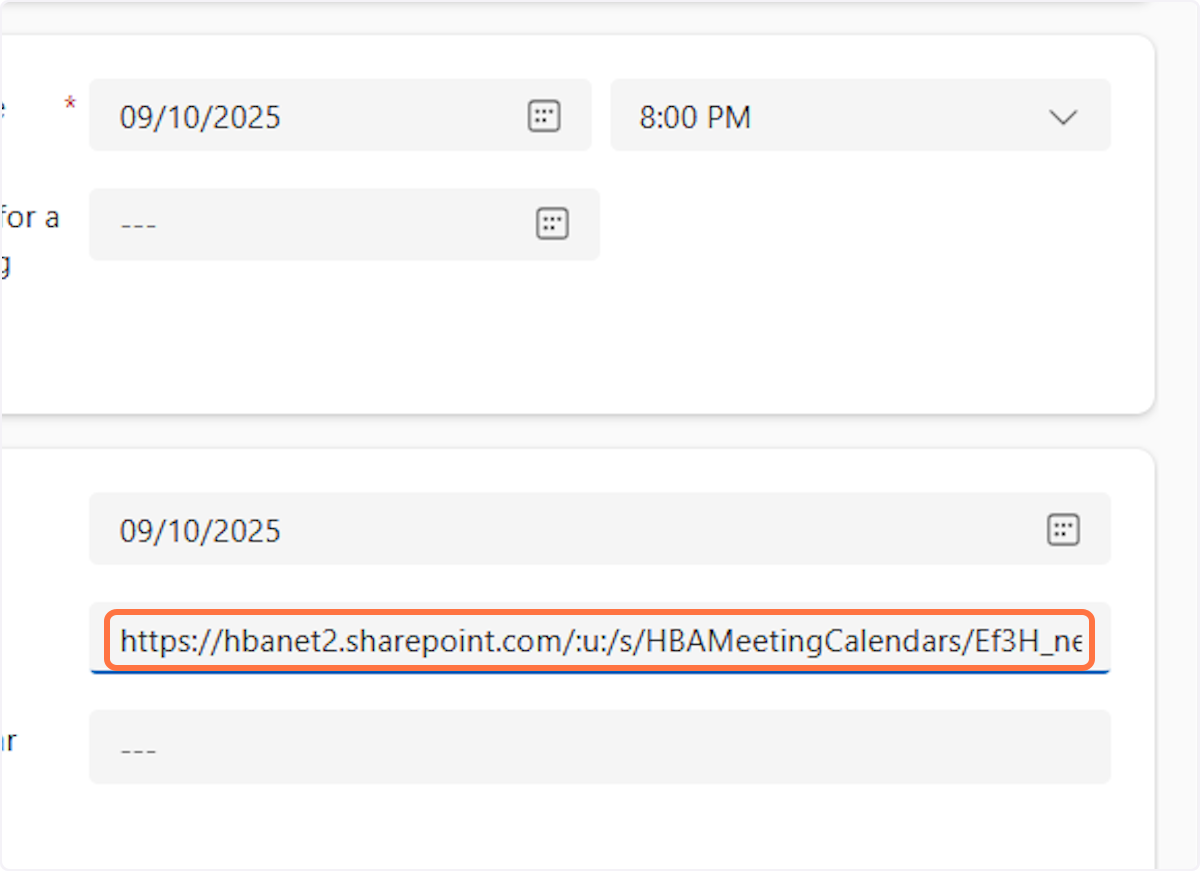
9. Update the Meeting Start Date and Meeting End date to the new date that the event has been rescheduled for
In this example we are changing the date from 8/13/2025 to 9/10/2025

10. Click on Registration Ends, and update the date to the new date
11. Click on Save
12. Click on Web Parameters
13. In the Publish to Web field change the flag from No to YES
14. Click on Save
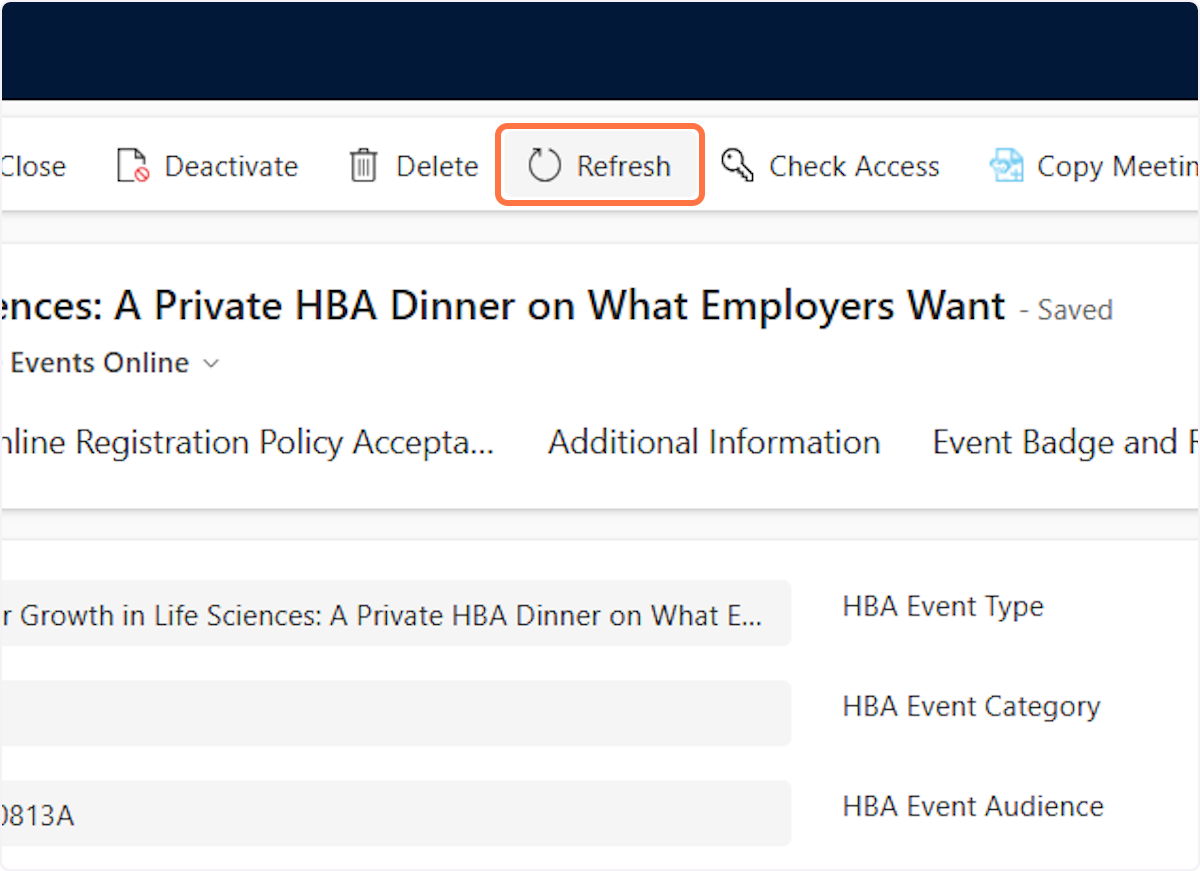
15. Click on General

16. Click on Refresh
17. The Meeting calendar link will then create a new link with the updated date. Just take this link and copy it in a web browser to confirm that the information is correct on the calendar link.
18. Click Save & Close